
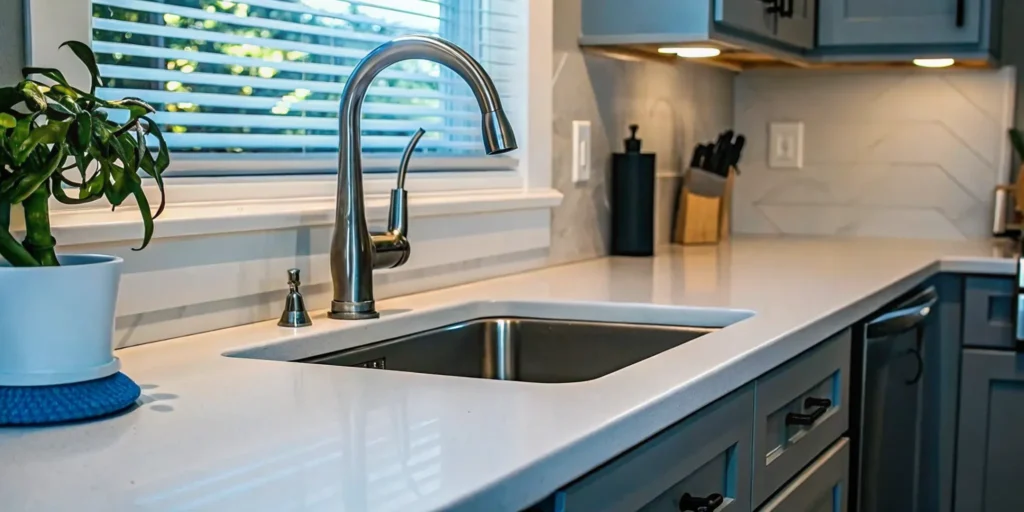
That constant drip from your kitchen faucet is more than just an annoying sound; it’s money going right down the drain. A single leaky faucet can waste hundreds of gallons of water a year, adding a noticeable amount to your utility bills. Beyond the waste, an old or malfunctioning faucet can be a daily frustration. A kitchen faucet replacement is a smart investment that not only stops the leak for good but also improves your kitchen’s functionality and adds to your home’s value. This guide will help you choose a durable, efficient faucet and show you how to install it correctly, ensuring your upgrade is a long-lasting success.
Need a Plumber in Fort Myers?
Whiskey Creek Plumbing has delivered five-star, fixed-price plumbing services to Southwest Florida homeowners and businesses 25 years of experience, proudly serving Lee County and surrounding areas since 2022. No surprises — just guaranteed work.
Locally owned & operated · Fixed-price guarantee · 25 years of experience, proudly serving Lee County and surrounding areas since 2022
Key Takeaways
- Know the difference between a simple swap and a pro job: A constant drip or visible rust means it’s time for a new faucet. While this is often a great DIY project, stop immediately and call a plumber if you find corroded pipes or signs of water damage.
- Do your homework before you buy or begin: Before choosing a faucet, confirm your sink’s hole configuration and supply line compatibility. Gathering the right tools, like a basin wrench and plumber’s putty, ahead of time prevents mid-project headaches.
- Install with care and maintain for performance: Avoid common mistakes like overtightening connections, which can cause leaks. After installation, keep your faucet working perfectly by regularly cleaning the aerator and using gentle, finish-safe cleaners.
Signs It’s Time for a New Kitchen Faucet
Your kitchen faucet works hard every single day, so it’s easy to take it for granted until something goes wrong. While some issues can be fixed with a simple repair, there comes a time when replacing the entire faucet is the smarter, more cost-effective choice. Recognizing the signs can save you from a sudden plumbing emergency and give you a chance to upgrade your kitchen’s style and function. If you’re wondering whether to repair or replace, here are a few clear indicators that it’s time for something new.
That Constant Drip You Can’t Ignore
That drip…drip…drip sound is more than just a minor annoyance. A constantly dripping faucet wastes a surprising amount of water over time, which shows up on your utility bill. It can also create stubborn stains in your sink basin and even lead to water damage in the cabinet below. While a worn-out washer might be the culprit, a persistent drip often points to internal corrosion or a cracked valve that a simple fix won’t solve for long. If you’ve tried tightening everything and the drip just won’t quit, it’s a strong signal that the faucet’s internal mechanisms are failing. A full replacement is often the best way to stop the leak for good.
Visible Rust and Mineral Buildup
Take a close look at your faucet. Do you see reddish rust spots around the base or crusty, white mineral deposits on the spout? These issues are not just cosmetic. Rust can eat away at the faucet’s metal, leading to leaks and contaminating your water. Mineral buildup, a common problem in areas with hard water, can clog the faucet from the inside out, restricting water flow and causing damage to internal parts. While you can scrub away surface grime, you can’t fix internal corrosion. If your faucet looks old and corroded, it’s a sign that it’s time for an upgrade. Installing a water treatment system can also help protect your new faucet from future buildup.
Weak Water Flow or Low Pressure
If washing dishes has become a chore due to a weak, sputtering stream of water, your faucet might be the problem. The first thing to check is the aerator, the small screen at the tip of the spout. It can often get clogged with sediment and minerals. If you’ve cleaned the aerator and the water pressure is still low, the issue is likely deeper inside the faucet. Over the years, mineral deposits can build up within the faucet’s body and supply lines, creating a blockage that’s difficult to clear. Instead of struggling with a weak flow, replacing the faucet can instantly restore the strong, steady pressure you need for daily kitchen tasks.
An Outdated Style or Worn-Out Finish
Sometimes, a faucet works just fine but simply looks out of place. An old, dated faucet with a scratched or peeling finish can make your entire kitchen feel tired. Replacing your kitchen faucet is one of the easiest and most affordable ways to give your space a mini-makeover. A new faucet can serve as a stylish focal point, tying together your countertops, sink, and hardware. With so many modern designs available, from touchless technology to pull-down sprayers, an upgrade can improve both the look and functionality of your sink. It’s a small change that makes a big difference in how you feel about your kitchen.
How to Pick the Perfect Replacement Faucet
Choosing a new faucet can feel like a big decision. It’s one of the most-used fixtures in your kitchen, so you want something that not only looks great but also works perfectly for your daily routine. Before you get carried away by all the shiny finishes and cool features, there are a few practical things to check. Thinking through these details first will save you from the headache of buying a faucet that doesn’t fit your sink or your needs.
From the number of holes in your countertop to the type of water lines you have, a little prep work goes a long way. We’ll walk through the five key things to consider to make sure you find a faucet that you’ll love for years to come. It’s all about finding that perfect blend of style, function, and compatibility.
Check Your Sink’s Mounting Holes
Before you even start browsing, take a peek under your sink or look at the base of your current faucet. You need to know how many holes are available for mounting. Most sinks have a configuration of one, three, or four holes. Your new faucet must match this setup. A single-hole faucet gives a clean, modern look, while a three-hole model often includes separate handles for hot and cold water. If you fall in love with a single-hole faucet but have a three-hole sink, don’t worry. Many faucets come with a deck plate (escutcheon) to neatly cover the extra holes.
Match the Faucet to Your Home’s Water Pressure
Water pressure can affect how well your new faucet performs. While most modern faucets are designed to work with standard home water pressure, some high-efficiency or specialty models have specific requirements. If you’ve noticed your water flow seems weak throughout your house, a new faucet might not solve the underlying problem. It’s a good idea to address any pressure issues first. If you suspect a bigger problem with your plumbing, our team can help diagnose it. We offer a full range of plumbing services to get your water flowing just right.
Choose Your Faucet Type and Finish
This is where you can let your personal style shine. Do you want a faucet with a pull-down or pull-out sprayer for easy rinsing, or do you prefer a more traditional fixed spout with a separate side spray? High-arc, gooseneck faucets are great for filling tall pots, while lower-profile models can create a more subtle look. Then there’s the finish. From classic chrome and brushed nickel to modern matte black and champagne bronze, choose a finish that complements your kitchen’s hardware and is easy to keep clean.
Confirm Your Supply Lines are Compatible
Next, you’ll need to check the water supply lines under your sink. These are the flexible hoses that connect your faucet to the hot and cold water shut-off valves. Make sure the new faucet you choose comes with compatible supply lines or that you can easily purchase ones that fit your existing valves. The best way to do this is to snap a quick photo of your under-sink setup before you go shopping. If looking at pipes and valves feels a bit out of your comfort zone, that’s what we’re here for. As a family-run business, we’re always happy to help our neighbors in Fort Myers.
Don’t Overlook the Warranty
A good warranty is a sign that the manufacturer stands behind its product. Look for trusted brands like Moen, Delta, or Kohler, which often offer limited lifetime warranties on their faucets and finishes. This protects you from manufacturing defects and can save you a lot of money and frustration down the road. While a faucet with a strong warranty might cost a little more upfront, the peace of mind and long-term reliability are well worth the investment. It ensures your new faucet will function beautifully for years.
Your DIY Toolkit: Tools and Materials
Before you roll up your sleeves and get under the sink, let’s talk about prep. Gathering the right tools and materials ahead of time is the secret to a smooth, successful faucet replacement. It saves you from making extra trips to the hardware store and helps prevent those frustrating moments when you realize you don’t have what you need. Think of it as setting yourself up for a win. A little organization now will make the entire project feel much more manageable, whether you’re a seasoned DIYer or trying this for the first time.
Essential Tools
You don’t need a professional-grade toolbox for this job, but a few key items are non-negotiable. First up is a basin wrench or an adjustable wrench. The basin wrench is specially designed to grip the nuts holding your old faucet in place, which are often in tight, awkward spots. If you don’t have one, a standard adjustable wrench can work, but it might be a bit trickier. You’ll also want a flashlight or headlamp. The cabinet under your sink is darker than you think, and being able to see clearly will make the entire process much easier and safer. A bucket and some old towels are also great to have on hand to catch any residual water.
Necessary Materials
With your tools ready, let’s gather your materials. The star of the show is, of course, your new kitchen faucet. Make sure it’s compatible with your sink’s hole configuration (most sinks have one, three, or four holes). Next, you’ll need plumber’s tape, also known as Teflon tape. You’ll wrap this around the threaded connections to create a watertight seal and prevent drips. Finally, grab some plumber’s putty or a tube of silicone sealant. This is used to create a seal between the base of the new faucet and the sink deck, stopping water from seeping underneath. These simple materials are essential for a professional-looking, leak-free finish for all your plumbing services.
How to Install Your New Kitchen Faucet: A Step-by-Step Guide
Ready to give your kitchen a mini-makeover? Replacing a faucet is a project you can definitely handle. Before you start, make sure to read the instructions that came with your new faucet, as every model is a little different. Clear out the cabinet under your sink and lay down an old towel to protect the space and catch any drips. With your tools and new faucet ready, we can walk through this one step at a time.
Step 1: Shut Off the Water Supply
First things first, you absolutely must turn off the water. Look for two small valves under your kitchen sink, one for the hot water line and one for the cold. Turn the handles clockwise until they are fully closed. If you don’t have shut-off valves under your sink, or if they are old and won’t budge, you’ll need to turn off the main water supply to your entire house. If you run into corroded or stuck valves, it’s a sign that you might need professional plumbing services to avoid causing a bigger problem.
Step 2: Drain the Lines and Prep Your Workspace
With the water supply off, go ahead and open the handles on your old faucet. This will release any pressure and allow the water still in the lines to drain out into the sink. It’s a simple step that prevents you from getting a face full of water when you disconnect the lines. Now is also a great time to place a small bucket or bowl under the pipes to catch any residual water that will drip out during the removal process. A little preparation here will make the entire job cleaner and easier.
Step 3: Disconnect and Remove the Old Faucet
This step can be the most challenging part of the job, mostly because the space under the sink is so tight. Using a basin wrench or an adjustable wrench, carefully loosen the nuts connecting the hot and cold water supply lines to the shut-off valves. Once they’re disconnected, find the mounting nuts that hold the faucet base to the underside of the sink. Loosen and remove these nuts. After they are off, you should be able to pull the old faucet straight up and out of the sink from above.
Step 4: Clean the Sink Surface and Apply Sealant
After you remove the old faucet, you’ll probably find a ring of grime and mineral deposits left behind. It’s important to clean this area thoroughly with a cloth and a non-abrasive cleaner to ensure your new faucet can form a tight seal. Some new faucets come with a built-in rubber gasket, while others require you to apply a thin bead of plumber’s putty around the base. Be sure to check the manufacturer’s instructions to see what your specific model needs for a watertight installation.
Step 5: Mount the New Faucet
It’s time to put the new faucet in place. From above the sink, carefully guide the faucet’s flexible supply lines down through the mounting hole (or holes) in the sink deck or countertop. If your faucet includes a deck plate, make sure it’s centered correctly before you proceed. From underneath, slide on any included washers and then thread on the mounting nuts. Hand-tighten them first to get everything situated, then use your wrench to give them a final quarter-turn until the faucet feels secure and doesn’t wobble.
Step 6: Connect the Water Supply Lines
Now you’ll connect the new faucet to your home’s water supply. Attach the faucet’s supply lines to the corresponding hot and cold shut-off valves. If your new faucet didn’t come with integrated supply lines, this is the perfect opportunity to replace your old ones. To help create a leak-proof connection, you can wrap the threads of the shut-off valves with plumber’s tape before attaching the lines. Tighten the nuts with a wrench until they are snug, but be careful not to overtighten them, as this can damage the fittings.
Step 7: Turn the Water On and Check for Leaks
This is the final check. Slowly turn the handles on the hot and cold shut-off valves counter-clockwise to turn the water back on. Once the water is on, inspect all of your new connections, both under the sink at the valves and up at the base of the faucet. Look closely for any drips or moisture. Let the water run for a minute or two, then turn it off and check again. If everything is dry, you’ve successfully installed your new kitchen faucet.
Common Faucet Replacement Mistakes to Avoid
Even a straightforward DIY project can go sideways if you’re not careful. Replacing a kitchen faucet seems simple enough, but a few common missteps can turn a quick afternoon task into a major headache. Trust me, I’ve seen it all. Taking a moment to learn from these frequent mistakes will save you from a frantic call for help, a water-logged cabinet, or a second trip to the hardware store. Let’s walk through what to watch out for so your faucet installation is a total success from start to finish. By sidestepping these pitfalls, you’ll feel confident and end up with a beautiful, leak-free faucet you can be proud of.
Forgetting to Shut Off the Water
This might sound obvious, but you’d be surprised how often it happens in the rush to get started. Before you loosen a single nut, your absolute first step is to turn off the water. Look for two small handles or knobs in the cabinet directly under the sink; these are the shutoff valves for your hot and cold water lines. Turn them clockwise until they stop. If you can’t find them or they won’t budge, you’ll need to shut off the main water supply to your entire house. Forgetting this step will result in an indoor water feature you definitely didn’t plan for.
Using the Wrong Tools in Tight Spaces
Working in the cramped space under a sink is awkward enough without using the wrong tools. Trying to use a standard wrench or pliers on the nuts holding your old faucet in place is a recipe for frustration and scraped knuckles. This is where a basin wrench becomes your best friend. This specialty tool is designed to reach up into that tight area and grip the mounting nuts. Using the right tool for the job not only makes the process faster but also prevents you from accidentally stripping the nuts or damaging your plumbing connections.
Improperly Sealing the Faucet Base
A new faucet needs a watertight seal to prevent water from seeping under its base and into your cabinet. Most faucet kits come with a rubber or plastic gasket for this purpose, but some models require plumber’s putty or silicone caulk. If you skip this step or apply the sealant unevenly, you’re creating a path for future leaks and potential water damage to your countertop. Make sure you create a complete, unbroken seal around the entire base of the faucet before you fully tighten it down. It’s a small detail that makes a huge difference.
Overtightening the Connections
When you’re dealing with water, it’s tempting to tighten every connection as much as humanly possible. However, overtightening can be just as bad as leaving a connection too loose. Applying too much force can crack the mounting nuts, strip the threads on your fittings, or damage the rubber washers that create the seal. This can cause an immediate leak or create a weak point that fails later. The best approach is to hand-tighten the connections first, then use a wrench to give them an extra quarter- to half-turn. The connection should be snug, not strained.
Mismatching Your New Faucet and Old Plumbing
Before you even head to the store, take a close look at your sink. How many holes are on the deck where the current faucet is mounted? One, two, three, or four? Your new faucet needs to match this configuration, or you’ll need a deck plate to cover any unused holes. You should also check the size of your water supply lines to ensure the new faucet’s connectors are compatible. Confirming these details beforehand prevents the disappointment of getting home and realizing your beautiful new faucet simply won’t fit your existing setup.
Reusing Old, Worn-Out Supply Lines
It can be tempting to save a few dollars by hooking your new faucet up to the old flexible supply lines, but please don’t. These lines are a common failure point in plumbing. Over time, they can become brittle, corroded, and prone to bursting. Attaching a brand-new faucet with old, worn-out lines is asking for trouble down the road. Always invest in a new pair of high-quality supply lines. It’s a small price to pay for peace of mind. If you find that your old lines are corroded onto the shutoff valves, it might be time to call in professional plumbing services.
Can You Really Replace a Faucet Yourself?
So, you’re staring at your old kitchen faucet and thinking, “Can I really do this myself?” It’s a great question, and the answer is often yes. With a little patience and the right preparation, swapping out a faucet can be a totally manageable weekend project. It’s one of those home improvement tasks that feels incredibly satisfying once you’re done. You get to enjoy an instant, functional upgrade that you handled all on your own.
However, it’s also a job where a small mistake can lead to a big, wet mess. The key is knowing what makes for a straightforward replacement versus a project that might be better left to a professional. It all comes down to the condition of your existing plumbing and your comfort level with the tools. Before you start unscrewing anything, let’s walk through what to expect so you can decide if this DIY is right for you.
When a DIY Installation Is a Great Idea
For most homeowners, replacing a kitchen faucet is a fantastic DIY project. If you’re doing a simple swap, like replacing an old faucet with a new one of the same type, you can likely get the job done in an hour or two. This is especially true if your home’s plumbing is in good shape and you aren’t trying to reconfigure anything under the sink. A successful DIY faucet replacement is a great confidence builder and can save you a bit of money. If everything looks straightforward and you’re just looking for a style update, this is the perfect time to roll up your sleeves and give it a try.
Tips for a Successful Project
To make sure your project goes smoothly, a few pro tips can make all the difference. First and most importantly, always turn off the water supply valves under the sink before you start. This prevents any unexpected waterworks. When you install the new faucet, use plumber’s putty or tape to create a watertight seal around the base and on the threaded connections. This is a crucial step for preventing slow leaks down the road. As you tighten the connections, make them snug, but don’t overtighten them. Using too much force can crack the fittings or damage the faucet. And of course, always follow the instructions that came with your new faucet, as they’ll have specific guidance for your model.
When Is It Time to Call a Professional Plumber?
While replacing a kitchen faucet can be a satisfying DIY project, there are times when it’s smarter to put down the wrench and call in a professional. Recognizing when a job is beyond your scope isn’t a sign of failure; it’s a savvy move that can save you from a much bigger headache and a more expensive repair down the road. A simple faucet swap can sometimes uncover hidden issues like decaying pipes or slow leaks that require an expert eye.
If you find yourself in over your head, don’t worry. A professional plumber has the experience and specialized tools to handle unexpected complications safely and efficiently. Knowing when to make that call is key. If you run into any of the following situations, it’s a good idea to contact a team of experts who can provide a full range of plumbing services and get the job done right.
You Discover Corroded Pipes or Damaged Lines
Once you’re under the sink, you might find that your water supply lines or the shut-off valves look a little worse for wear. If you see discoloration, flaking, bumps, or any signs of rust, you’re looking at corrosion. These pipes can become extremely brittle over time. Trying to force a rusted connection or attach a new faucet to a decaying pipe can cause it to crack or break, turning a small project into a full-blown water emergency. If you face corroded pipes, it’s best to stop what you’re doing. A professional has the right techniques to work with fragile plumbing without causing further damage.
You Find Signs of Hidden Water Damage
As you clear out the cabinet under your sink, pay close attention to the condition of the wood and the surrounding area. Do you notice any dark stains, soft or warped spots, or a persistent musty smell? These are classic signs of a slow, long-term leak that may have gone unnoticed for months or even years. Simply installing a new faucet won’t solve the underlying problem. A professional plumber can perform leak detection to pinpoint the source of the water, whether it’s a faulty drain, a leaky valve, or the old faucet itself, and ensure the issue is fully resolved before mold and rot cause more serious damage.
The Job Feels Too Big or Overwhelming
There’s no shame in admitting a project is more complex than you anticipated. Kitchen sinks are notoriously tight spaces, and sometimes the old faucet just doesn’t want to budge. If the mounting nuts are rusted solid, you can’t get your wrench into the right position, or you simply aren’t confident in your ability to finish the job without a leak, it’s time to call for help. When a project feels too complex, professional services are readily available. Rather than struggling and risking damage to your sink or plumbing, you can rely on a family-run team to handle it for you, giving you peace of mind that the installation is secure and leak-free.
How to Keep Your New Faucet in Top Shape
You’ve successfully installed your new kitchen faucet, and it looks fantastic. Now, let’s make sure it stays that way. With just a few simple habits, you can keep your faucet working perfectly and looking brand new for years to come. A little proactive care goes a long way in preventing drips, buildup, and other common issues that can turn a beautiful fixture into a frustrating problem.
Taking care of your faucet involves three key things: regular cleaning, understanding your faucet’s finish, and knowing how to spot the first signs of trouble. Getting ahead of these small issues will protect your investment and help you avoid a much bigger repair job down the road.
Simple Cleaning and Maintenance Habits
Keeping your faucet in great shape doesn’t require a lot of work, just consistency. One of the easiest and most effective tasks is to regularly clean the aerator, which is the small screen at the end of the spout. It can get clogged with mineral deposits, which is common here in Florida, leading to weak or uneven water flow. Simply unscrew it, rinse it out, and screw it back on.
You should also get into the habit of checking for small leaks around the base and handles. Catching a tiny drip early can prevent water damage under your sink. If you notice a persistent drip from the spout, it might be time to replace the internal washers or seals. While some minor tasks are DIY-friendly, our team is always ready to handle any plumbing services you need to keep things running smoothly.
Pick a Finish That’s Easy to Care For
The finish on your faucet plays a big role in its daily maintenance. If you chose a classic chrome finish, you’ll want to wipe it down regularly with a soft cloth to prevent water spots. For trendy matte black or brushed nickel finishes, which are great at hiding fingerprints, avoid abrasive cleaners that could scratch the surface. A simple solution of mild soap and water is usually all you need.
Understanding how to care for your specific finish will keep it from looking dull or damaged over time. No matter what material you have, steering clear of harsh chemical cleaners and scrub pads is always a good rule of thumb. Gentle care is the key to preserving that day-one shine.
Learn to Spot Early Signs of Trouble
Knowing what to look for can help you catch a problem before it becomes a major headache. If your faucet is constantly dripping even after you’ve tightened everything, it’s a clear sign something is wrong internally. Similarly, if you have low water pressure and you’ve already cleaned the aerator, there might be a blockage deeper in the lines.
Keep an eye out for visible rust, which can indicate corrosion, or any cracks in the faucet body or handles. If the handles feel stiff or loose, the internal valves may be wearing out. Spotting these issues early gives you time to act before you’re faced with a serious leak. If you notice any of these red flags, it might be time to call for a professional leak detection and repair.
Related Articles
Need a Plumber in Fort Myers?
Whiskey Creek Plumbing has delivered five-star, fixed-price plumbing services to Southwest Florida homeowners and businesses 25 years of experience, proudly serving Lee County and surrounding areas since 2022. No surprises — just guaranteed work.
Locally owned & operated · Fixed-price guarantee · 25 years of experience, proudly serving Lee County and surrounding areas since 2022
Frequently Asked Questions
Is it better to repair my leaky faucet or just replace it? A small drip can sometimes be fixed by replacing a simple washer. However, if you’re dealing with constant drips, visible rust, or crusty mineral buildup, a repair is often just a temporary fix. These issues usually point to internal parts wearing out. Replacing the faucet is often the more cost-effective choice in the long run, as it solves the problem for good and prevents future water waste and damage.
How do I know if I should do this myself or call a plumber? If you have modern plumbing, feel comfortable with basic tools, and are simply swapping one faucet for a similar one, this is a great DIY project. The time to call a professional is when you run into complications. If you discover corroded pipes, stuck shut-off valves, or signs of old water damage under the sink, it’s best to stop and get an expert opinion to avoid causing a bigger, more expensive problem.
My last faucet had terrible mineral buildup. How can I protect my new one? That white, crusty buildup is a common issue caused by hard water. To protect your new faucet, you can regularly clean the aerator (the small screen on the spout) to prevent clogs. For a long-term solution, you might consider a whole-house water treatment system. A water softener can prevent mineral deposits from forming in the first place, which protects not just your new faucet but all of your plumbing fixtures and appliances.
Do I really need to buy a special tool like a basin wrench? While you might get by with an adjustable wrench, a basin wrench is designed specifically for reaching the awkward nuts that hold the faucet in place. Using one will make the most difficult part of the job much easier and help you avoid scraping your knuckles. If you plan on doing more plumbing projects in the future, it’s a great tool to have. If not, think of it as a small investment to prevent a lot of frustration.
What’s the most common mistake people make that I should avoid? One of the most frequent mistakes is overtightening the connections. It’s natural to think tighter is better to prevent leaks, but applying too much force can crack the fittings or damage the seals, which actually causes leaks. The best method is to tighten the nuts by hand first, then use a wrench for a final quarter-turn until they feel snug.